VS Code
=======
VS Code works similarly on Linux and macOS. For Windows users see the msys2 section at the bottom of this page or use the Visual Studio setup.
Common
Install VS Code
- Download and install VS Code for your platform. NOTE: For an MIT Licensed version of VS Code without tracking - you can download the latest VSCodium release which has 1:1 feature parity as VS Code ( just Open Source ).
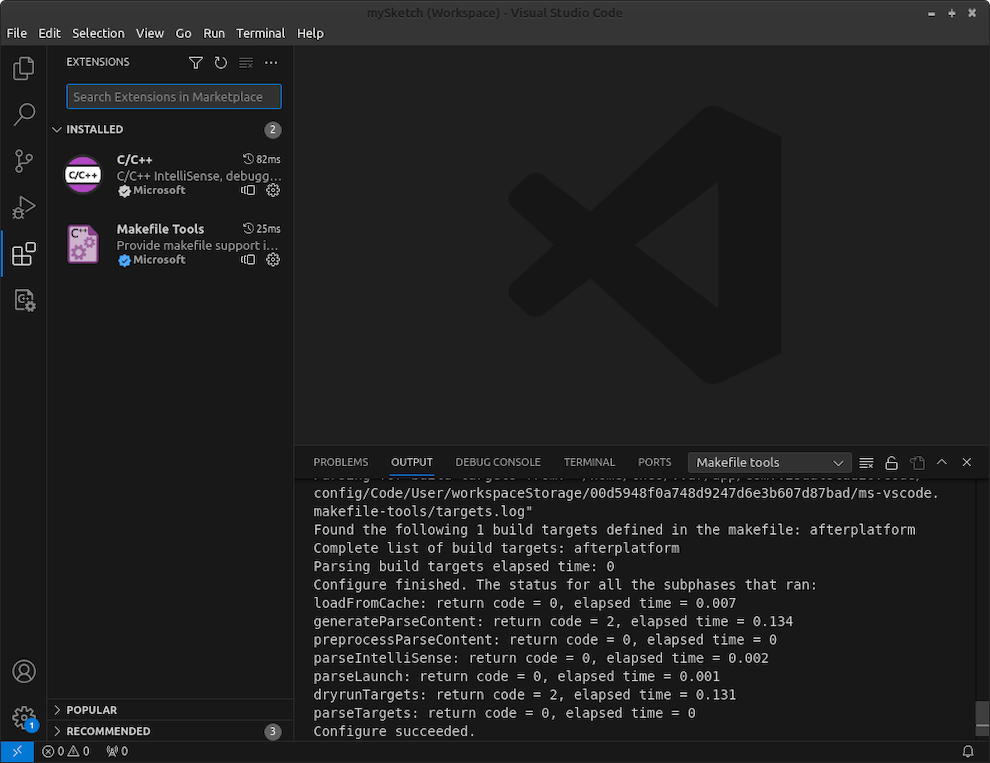
- When opening an OF project you may be asked to install extensions. We recommend only installing the Microsoft C/C++ extension and the Makefile extension.
- Important make sure Cmake extensions are NOT installed as they can interfere with your project build.
We recommend the following extensions for OF in VS Code.
Open a VS Code project.
The file extension of a VS Code project is .code-workspace. All examples should have a VS Code project file already eg: examples/3d/3DPrimitivesExample/3DPrimitivesExample.code-workspace. Double clicking on the file should open it in VS Code.
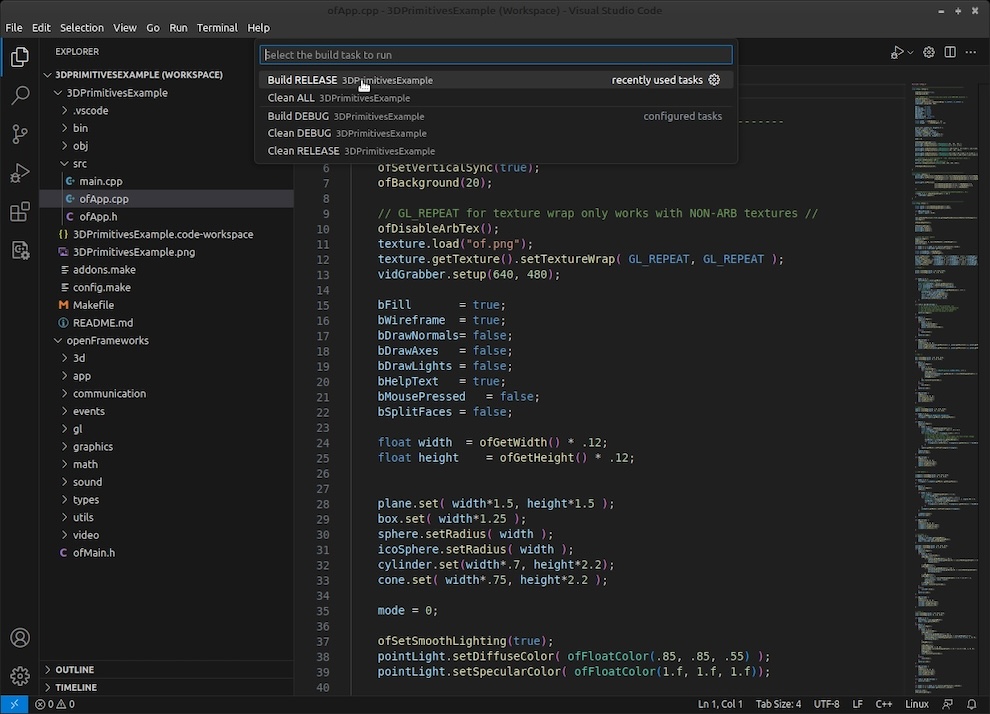
Building a VS Code project.
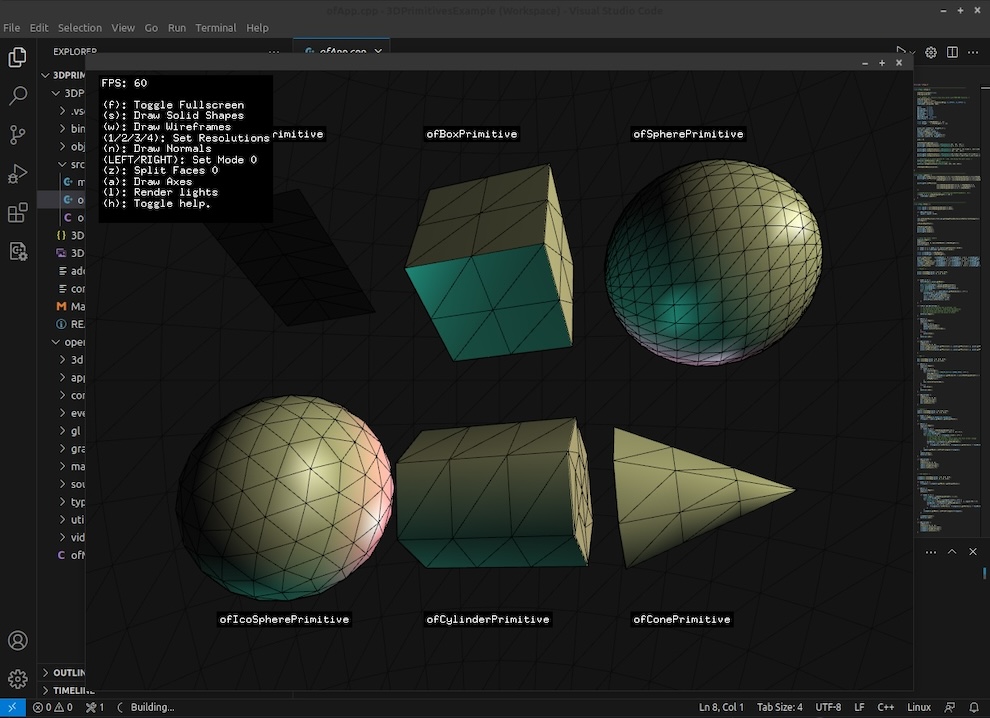
To build a VS Code project go up to the menu titled Terminal and select Run Build Task... and then Build Release. Build Release builds and also runs your project in Release mode.
Building and running in Release.
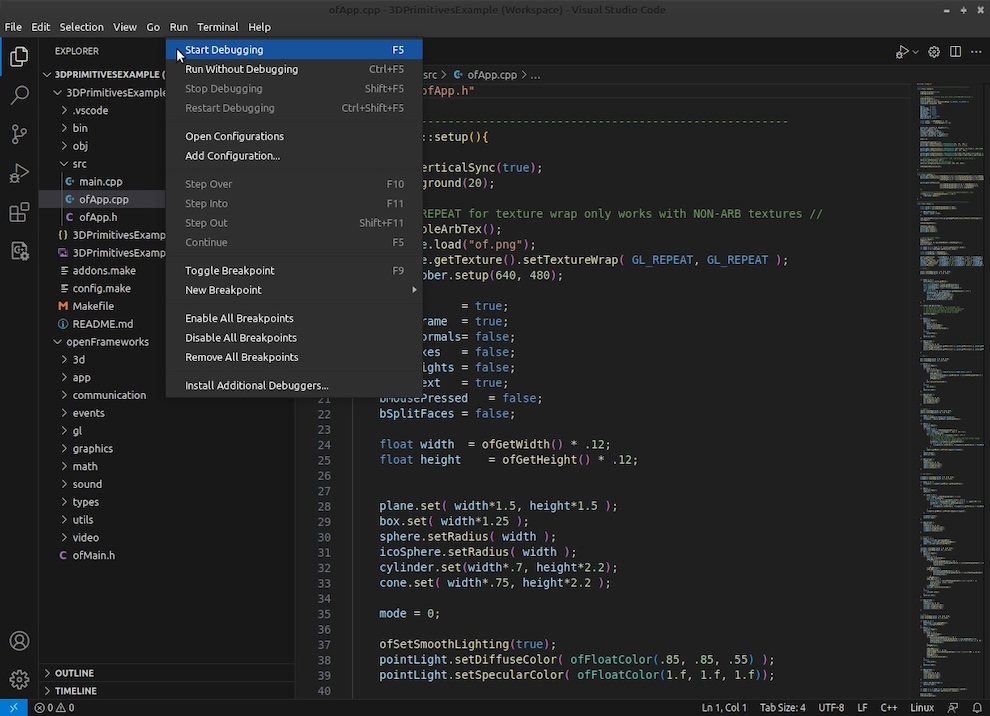
Debugging a VS Code project.
- First open the Terminal menu and select Run Build Task... and then Build Debug. This compiles the app for Debug but does not run it.
- Then open the Run menu and select Begin Debugging.
=======
MSYS2 ONLY
Setting up MSYS2 shell
Open the VS Code settings and search for 'terminal profile windows'.
In Terminal > Integrated > Automation Profile : Windows, select Edit in settings.json.
Then, edit the terminal.integrated.profiles.windows object to add OF-MINGW64
    "terminal.integrated.profiles.windows": {
        "OF-MINGW64":{
            "path": "C:\\msys64\\usr\\bin\\bash.exe",
            "color": "terminal.ansiBlue",
            "icon":"beaker",
            "overrideName":true,
            "args": ["--login", "-i"],
            "env": {
                "MSYSTEM": "MINGW64",
                "CHERE_INVOKING": "1",
                "MSYS2_PATH_TYPE": "inherit"
            }
        }
    },
    "terminal.integrated.defaultProfile.windows": "OF-MINGW64",
Now when you open a terminal in VS Code, it will open a MINGW64 shell where you can run the make commands as appropriate.
Edit C/C++ Extension settings
{
    "env": {
        "OF_ROOT": "C:/openFrameworks"
    },
    "configurations": [
        {
            "name": "OF-MINGW64",
            "includePath": [
                "${workspaceFolder}/**",
                "${env:OF_ROOT}/addons/**/src",
                "${env:OF_ROOT}/libs/openFrameworks/**",
                "c:/msys64/mingw64/include/**"
            ],
            "defines": [
                "_DEBUG",
                "UNICODE",
                "_UNICODE"
            ],
            "windowsSdkVersion": "10.0.19041.0",
            "compilerPath": "c:/msys64/mingw64/bin/g++.exe",
            "cStandard": "c17",
            "cppStandard": "c++17",
            "intelliSenseMode": "windows-gcc-x64"
        }
    ],
    "version": 4
}