

How_to_add_addon_to_project
Install the addon
Addons live in the addons folder of your openFrameworks installation. The 0.12.1 download includes core addons; community addons are listed at ofxaddons.com.
Download or clone the addon into addons. The folder name must match the addon name. For example, rename an extracted ofxExample-master folder to ofxExample, so its source is under addons/ofxExample/src. Follow the addon's README for any additional dependencies.
Add it with the Project Generator
Open the generator supplied with your openFrameworks installation. In Settings, check that OF path points to the root containing the addon you installed.
For a new project, select the addon in Addons before clicking Generate.
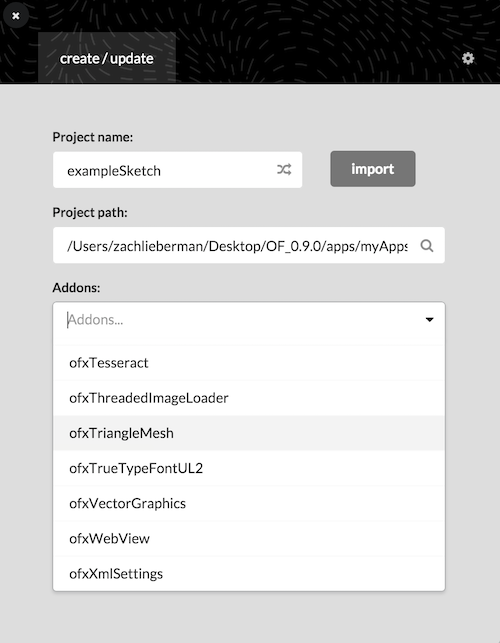
For an existing project:
- Click import, or drag the project folder onto the generator.
- Add or remove entries in Addons.
- Check that the correct Platforms are selected.
- Click Update, then reopen the generated project in your IDE.
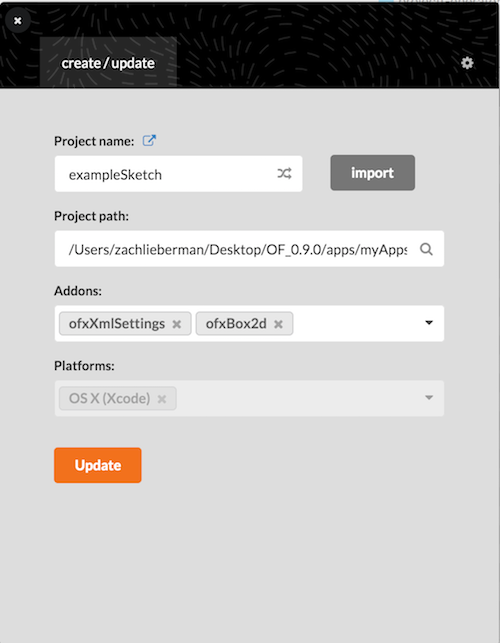
The generator updates the project's addons.make and the IDE project files. If you edit addons.make by hand, import and update the project again before building in Xcode or Visual Studio.
Makefile projects
Create or edit addons.make in the project root, next to Makefile and config.make. Put one addon name on each line:
ofxGui
ofxOsc
Run make again. Makefile builds read this file directly, so they do not need a generator update just to change the addon list.
Local addons can also be listed using paths relative to the project. The GUI shows local addons when importing a project; edit their paths in addons.make and reimport if you need to change them.
For command-line generation, -a"ofxGui,ofxOsc" sets the addon list. When updating an existing project, omit -a to keep reading its addons.make.
An addon must support your target platform and the openFrameworks version you are using. Selecting it in the generator does not build or download third-party libraries that its README asks you to install.
See Create a new project for the complete 0.12.1 GUI and command-line workflow.